What drove me make this Vinyl Project was my love for Iowa State. I have always wanted to go to Iowa state so I chose to make this vinyl decal and apply it to my car. Plus I think it looks amazing with all of its colors.What gave me the idea was I had just turned in my next class choices for Sophomore year ad some where requirements for Iowa State so I just had Iowa State on my Mind.
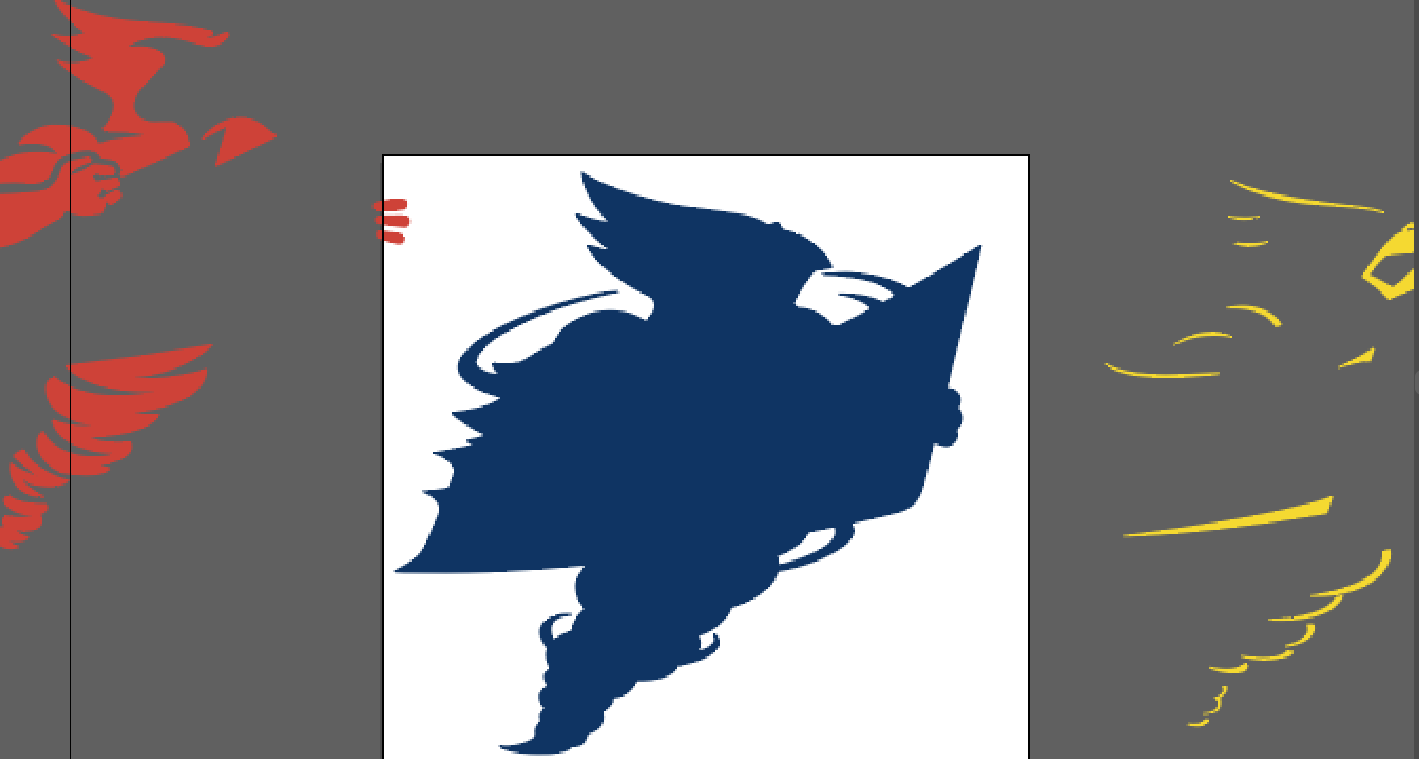
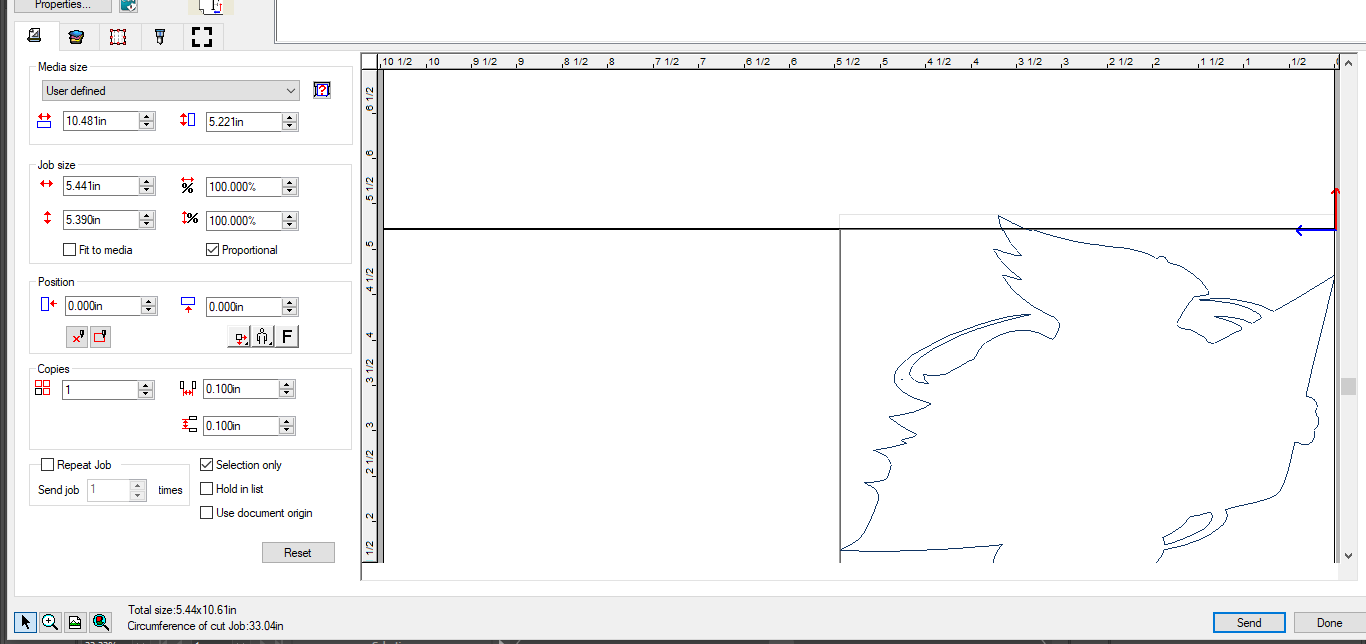
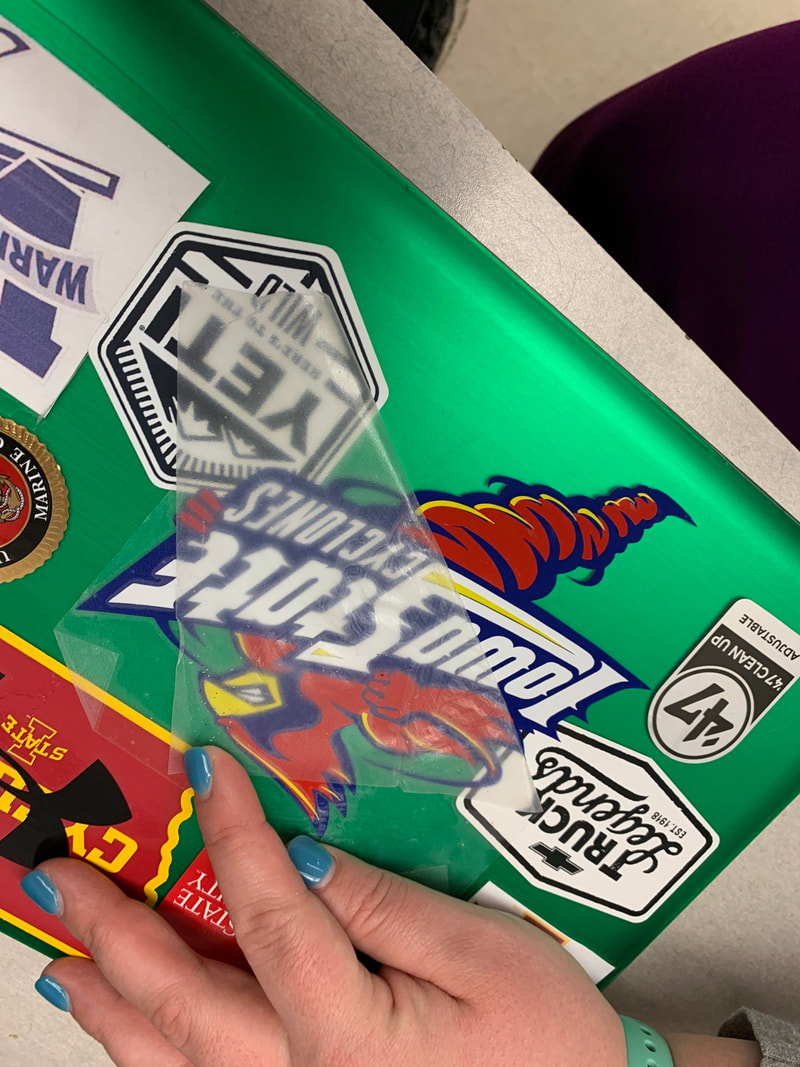
The process: First I made the desired platform on Illustrator ( length,width) then take then I took my desired picture from the internet. Then I copied and pasted it onto the platform then I outlined and separated my colors. Next I Found the base color and filled in all of the areas.Finally I exported my project to the vinyl cutter then I ran the program. I selected my first color and put it into the machine. Then I checked the size of my project and cut the vinyl. I repeated this process for each color. Once all of my colors are printed, I weeded( remove) out the extra vinyl. Then I put the non-base colors on transfer tape and applied them to the base cut out . Your Project should now look finished then apply transfer tape to the vinyl. Then find the surface you desire to apply it to, clean it, then apply vinyl, press down on it, and take off tape and admire.
Picture 1: Illustrator document.
Picture 2: Vinyl software.
Picture 3: Applying the Vinyl
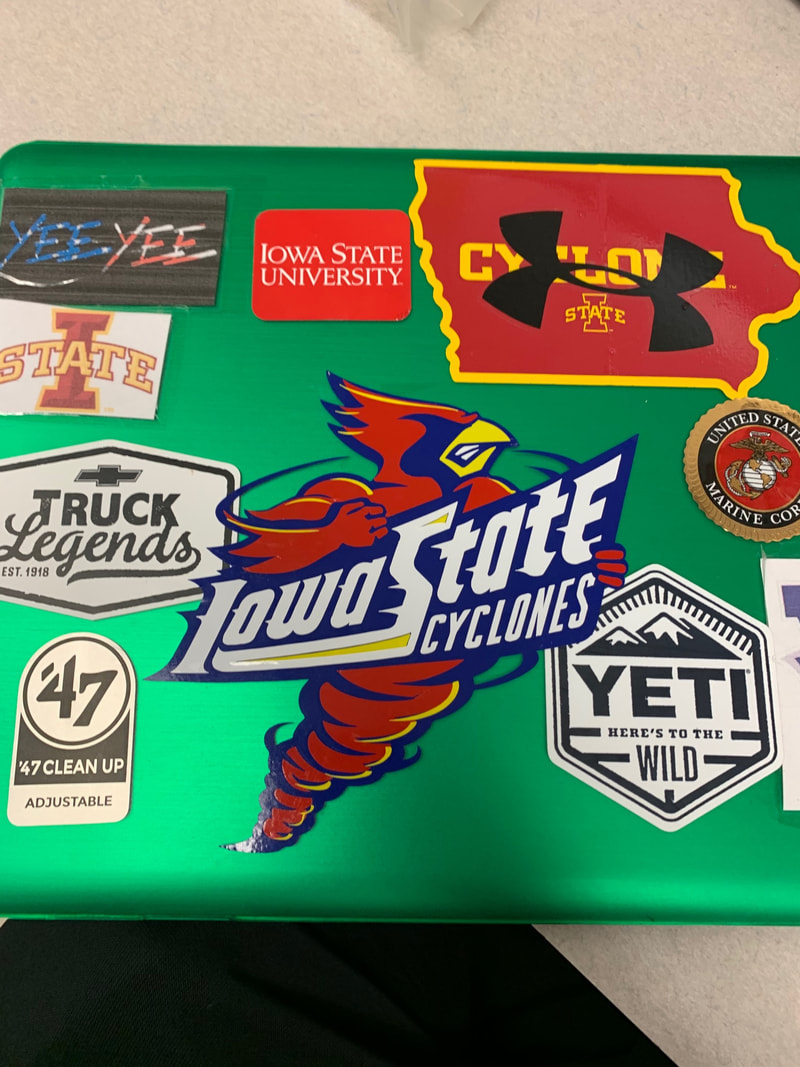
Picture 4: Finished project, its not a sticker!!!